主题
实战项目一:智能代码助手
本文将构建一个智能代码助手,它能够理解项目结构、执行代码修改、运行测试并进行错误诊断。这个项目综合运用了后端系统、CLI 工具和子代理等核心能力。
项目概述
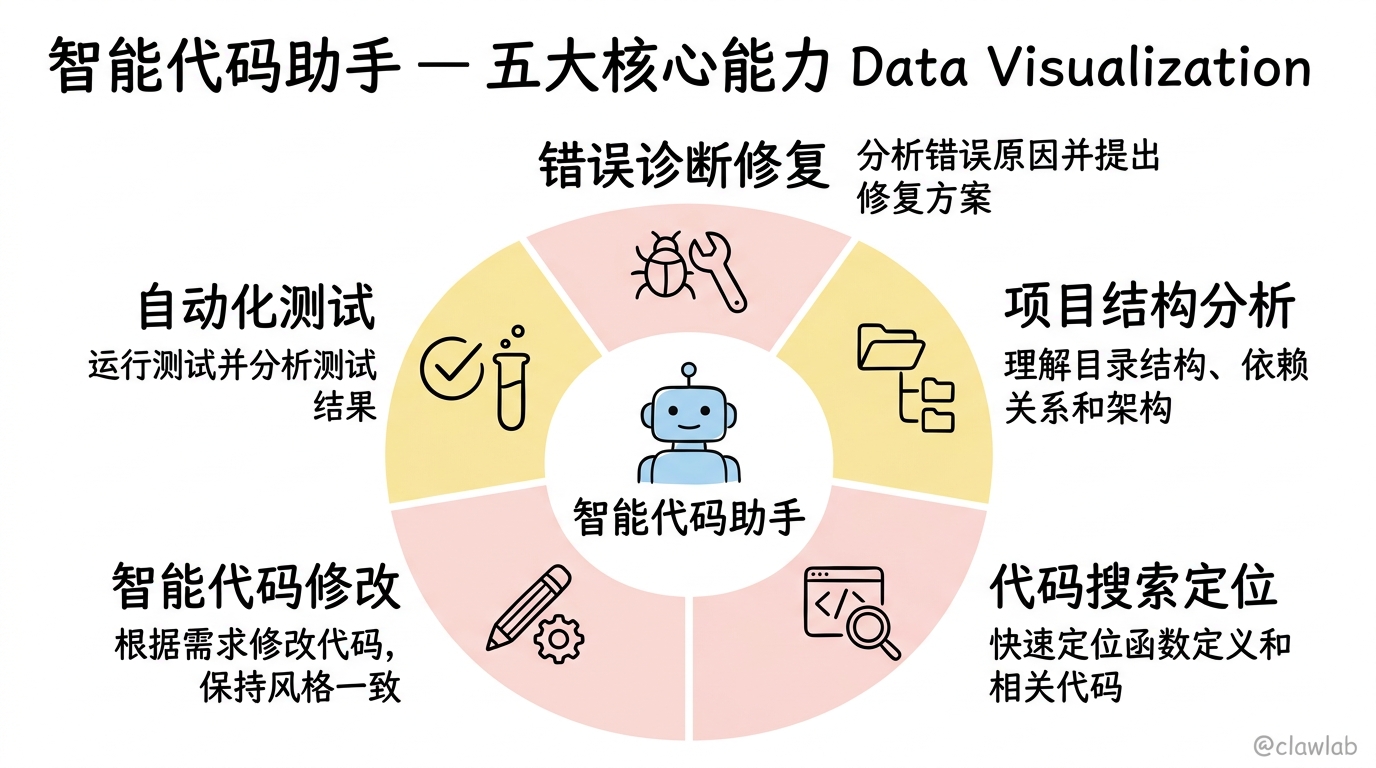
我们的智能代码助手具备以下核心功能:
- 项目结构分析:理解项目的目录结构、依赖关系和架构
- 代码搜索定位:快速定位相关代码和函数定义
- 智能代码修改:根据需求修改代码,保持代码风格一致
- 自动化测试:运行测试并分析测试结果
- 错误诊断修复:分析错误原因并提出修复方案
技术架构
智能代码助手
├── 主代理 (CodeAssistant)
│   ├── 任务规划和协调
│   └── 结果整合
├── 分析子代理 (Analyzer)
│   ├── 项目结构分析
│   └── 代码依赖追踪
├── 修改子代理 (Editor)
│   ├── 代码编辑
│   └── 格式化处理
└── 测试子代理 (Tester)
    ├── 运行测试
    └── 结果分析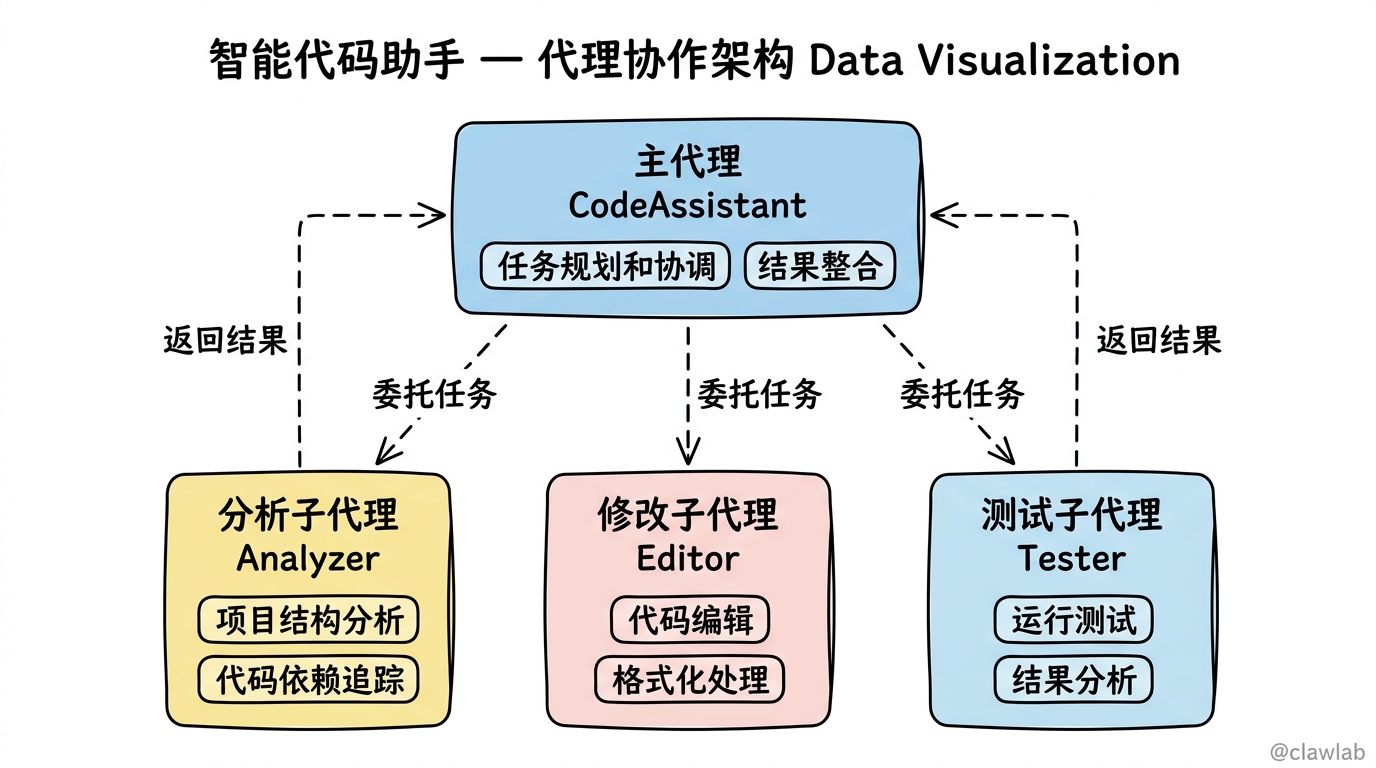
项目初始化
目录结构
code-assistant/
├── src/
│   ├── agents/
│   │   ├── main-agent.ts
│   │   └── subagents/
│   │       ├── analyzer.ts
│   │       ├── editor.ts
│   │       └── tester.ts
│   ├── backends/
│   │   └── composite.ts
│   ├── tools/
│   │   └── code-tools.ts
│   └── index.ts
├── package.json
└── tsconfig.json
安装依赖
bash
npm init -y
npm install @langchain/langgraph-agents @langchain/anthropic zod
npm install -D typescript @types/node
后端配置
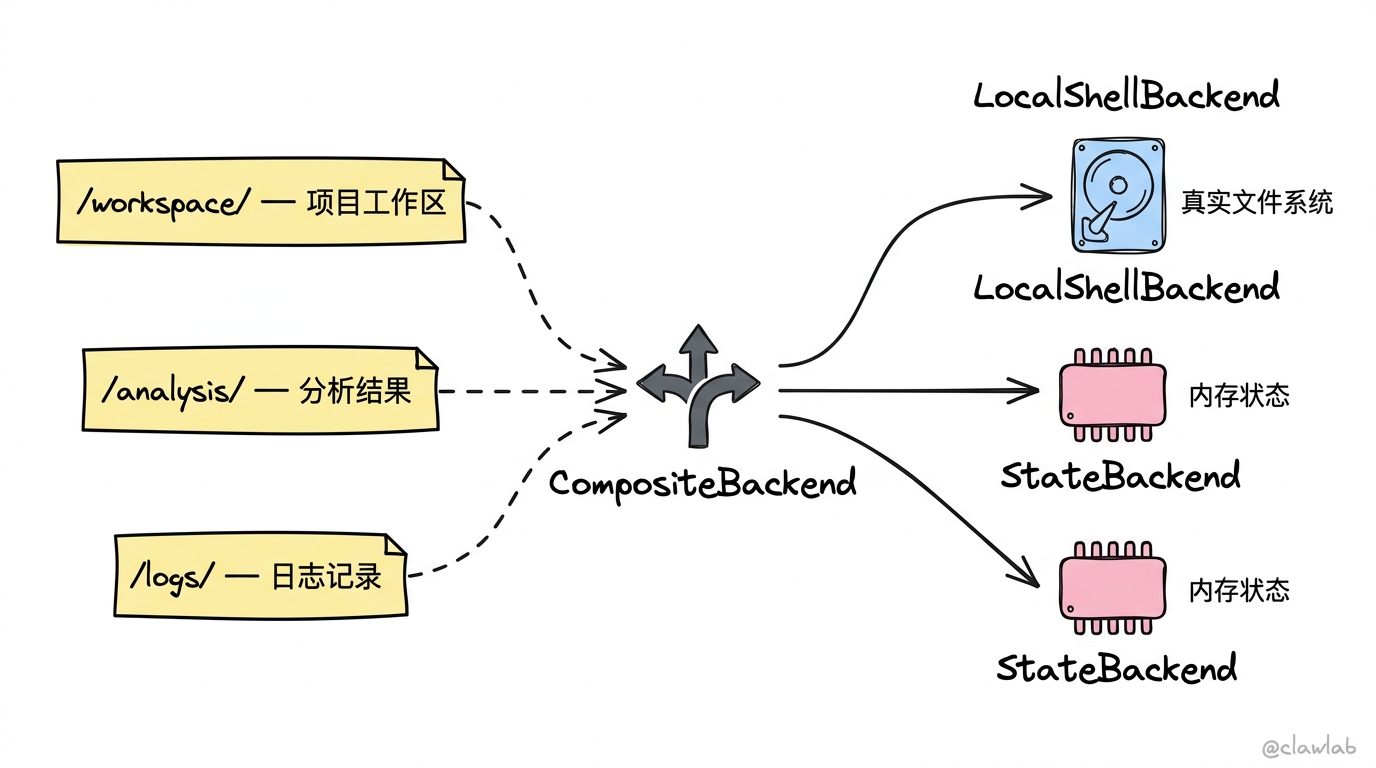
使用 CompositeBackend 实现多后端路由:
typescript
// src/backends/composite.ts
import {
  CompositeBackend,
  StateBackend,
  FilesystemBackend,
  LocalShellBackend,
} from "@langchain/langgraph-agents/backends";

export function createCodeAssistantBackend(projectPath: string) {
  return (rt: any) =>
    new CompositeBackend(
      new StateBackend(rt),
      {
        "/workspace/": new LocalShellBackend(rt, {
          workingDirectory: projectPath,
        }),
        "/analysis/": new StateBackend(rt),
        "/logs/": new StateBackend(rt),
      }
    );
}
自定义工具
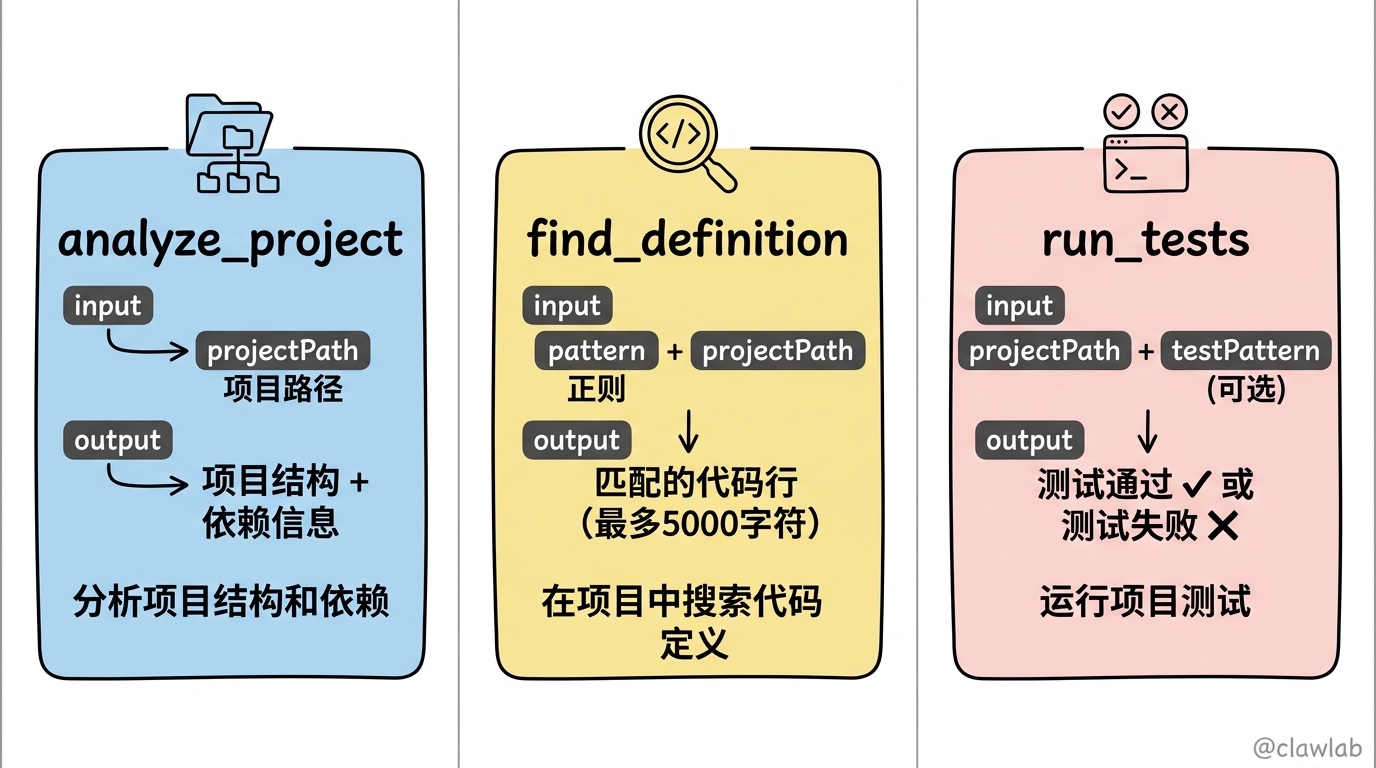
代码分析工具
typescript
// src/tools/code-tools.ts
import { tool } from "@langchain/core/tools";
import { z } from "zod";
import * as fs from "fs/promises";
import * as path from "path";

export const analyzeProjectTool = tool(
  async ({ projectPath }) => {
    const structure: string[] = [];

    async function scanDir(dir: string, prefix = "") {
      const entries = await fs.readdir(dir, { withFileTypes: true });

      for (const entry of entries) {
        if (entry.name.startsWith(".") || entry.name === "node_modules") {
          continue;
        }

        const fullPath = path.join(dir, entry.name);
        structure.push(`${prefix}${entry.name}${entry.isDirectory() ? "/" : ""}`);

        if (entry.isDirectory()) {
          await scanDir(fullPath, prefix + "  ");
        }
      }
    }

    await scanDir(projectPath);

    const packageJsonPath = path.join(projectPath, "package.json");
    let dependencies = "未找到 package.json";

    try {
      const pkg = JSON.parse(await fs.readFile(packageJsonPath, "utf-8"));
      dependencies = JSON.stringify(
        {
          dependencies: pkg.dependencies || {},
          devDependencies: pkg.devDependencies || {},
        },
        null,
        2
      );
    } catch {}

    return `项目结构:\n${structure.join("\n")}\n\n依赖:\n${dependencies}`;
  },
  {
    name: "analyze_project",
    description: "分析项目结构和依赖",
    schema: z.object({
      projectPath: z.string().describe("项目根目录路径"),
    }),
  }
);

export const findDefinitionTool = tool(
  async ({ pattern, projectPath }) => {
    const { execSync } = await import("child_process");

    try {
      const result = execSync(
        `grep -rn "${pattern}" --include="*.ts" --include="*.tsx" --include="*.js" --include="*.jsx" ${projectPath}`,
        { encoding: "utf-8", maxBuffer: 1024 * 1024 }
      );
      return result.slice(0, 5000);
    } catch {
      return "未找到匹配项";
    }
  },
  {
    name: "find_definition",
    description: "在项目中搜索代码定义",
    schema: z.object({
      pattern: z.string().describe("搜索模式(正则表达式)"),
      projectPath: z.string().describe("项目路径"),
    }),
  }
);

export const runTestsTool = tool(
  async ({ projectPath, testPattern }) => {
    const { execSync } = await import("child_process");

    try {
      const cmd = testPattern
        ? `npm test -- --testPathPattern="${testPattern}"`
        : "npm test";

      const result = execSync(cmd, {
        cwd: projectPath,
        encoding: "utf-8",
        maxBuffer: 1024 * 1024,
        timeout: 120000,
      });

      return `测试通过:\n${result}`;
    } catch (error: any) {
      return `测试失败:\n${error.stdout || ""}\n${error.stderr || ""}`;
    }
  },
  {
    name: "run_tests",
    description: "运行项目测试",
    schema: z.object({
      projectPath: z.string().describe("项目路径"),
      testPattern: z.string().optional().describe("测试文件匹配模式"),
    }),
  }
);
子代理定义
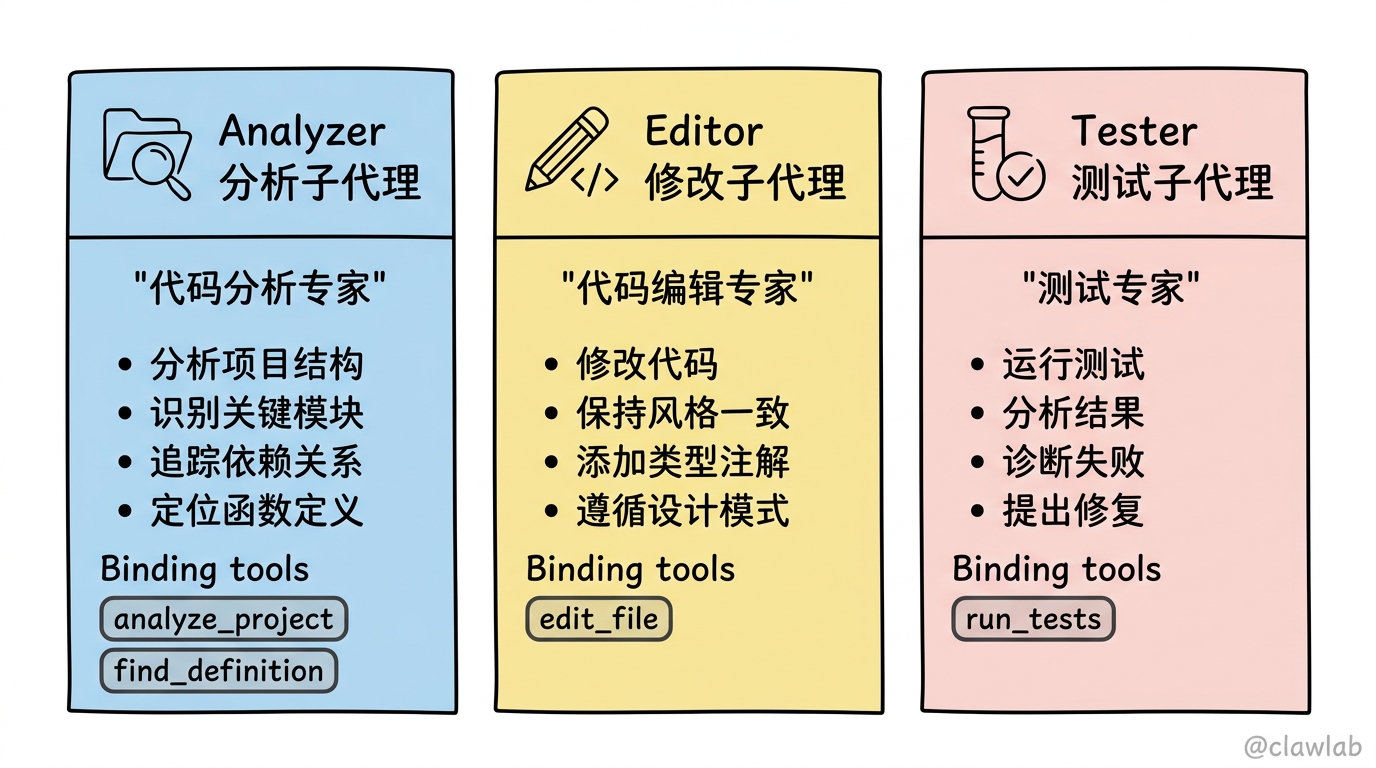
分析子代理
typescript
// src/agents/subagents/analyzer.ts
import { SubAgent } from "@langchain/langgraph-agents";
import { analyzeProjectTool, findDefinitionTool } from "../../tools/code-tools";

export const analyzerSubagent: SubAgent = {
  name: "analyzer",
  description: "分析项目结构、代码依赖和架构。用于理解项目整体情况和定位代码。",
  systemPrompt: `你是一个代码分析专家。你的任务是:

1. 分析项目结构,理解目录组织
2. 识别关键文件和模块
3. 追踪代码依赖关系
4. 定位特定函数或类的定义

分析时请注意:
- 关注入口文件和核心模块
- 识别设计模式和架构风格
- 记录重要的配置文件

输出格式清晰,便于后续任务使用。`,
  tools: [analyzeProjectTool, findDefinitionTool],
};
编辑子代理
typescript
// src/agents/subagents/editor.ts
import { SubAgent } from "@langchain/langgraph-agents";

export const editorSubagent: SubAgent = {
  name: "editor",
  description: "执行代码修改任务。包括添加功能、重构代码、修复 bug。",
  systemPrompt: `你是一个代码编辑专家。你的任务是:

1. 根据需求修改代码
2. 保持代码风格一致
3. 添加必要的类型注解
4. 遵循项目现有的设计模式

修改原则:
- 最小化改动范围
- 保持向后兼容
- 添加适当的错误处理
- 使用 edit_file 进行精确修改

完成后说明所做的改动。`,
};
测试子代理
typescript
// src/agents/subagents/tester.ts
import { SubAgent } from "@langchain/langgraph-agents";
import { runTestsTool } from "../../tools/code-tools";

export const testerSubagent: SubAgent = {
  name: "tester",
  description: "运行测试并分析结果。能够诊断测试失败原因并提出修复建议。",
  systemPrompt: `你是一个测试专家。你的任务是:

1. 运行项目测试
2. 分析测试结果
3. 诊断失败原因
4. 提出修复建议

分析测试失败时:
- 定位失败的测试用例
- 分析错误信息
- 追踪到源代码
- 给出具体的修复方案

输出测试摘要和建议。`,
  tools: [runTestsTool],
};
主代理配置
typescript
// src/agents/main-agent.ts
import { createDeepAgent } from "@langchain/langgraph-agents";
import { createCodeAssistantBackend } from "../backends/composite";
import { analyzerSubagent } from "./subagents/analyzer";
import { editorSubagent } from "./subagents/editor";
import { testerSubagent } from "./subagents/tester";

export function createCodeAssistant(projectPath: string) {
  return createDeepAgent({
    model: "claude-sonnet-4-20250514",
    name: "code-assistant",
    systemPrompt: `你是一个智能代码助手,帮助开发者理解和修改代码。

你有以下能力:
1. 分析项目结构和代码
2. 执行代码修改
3. 运行和分析测试

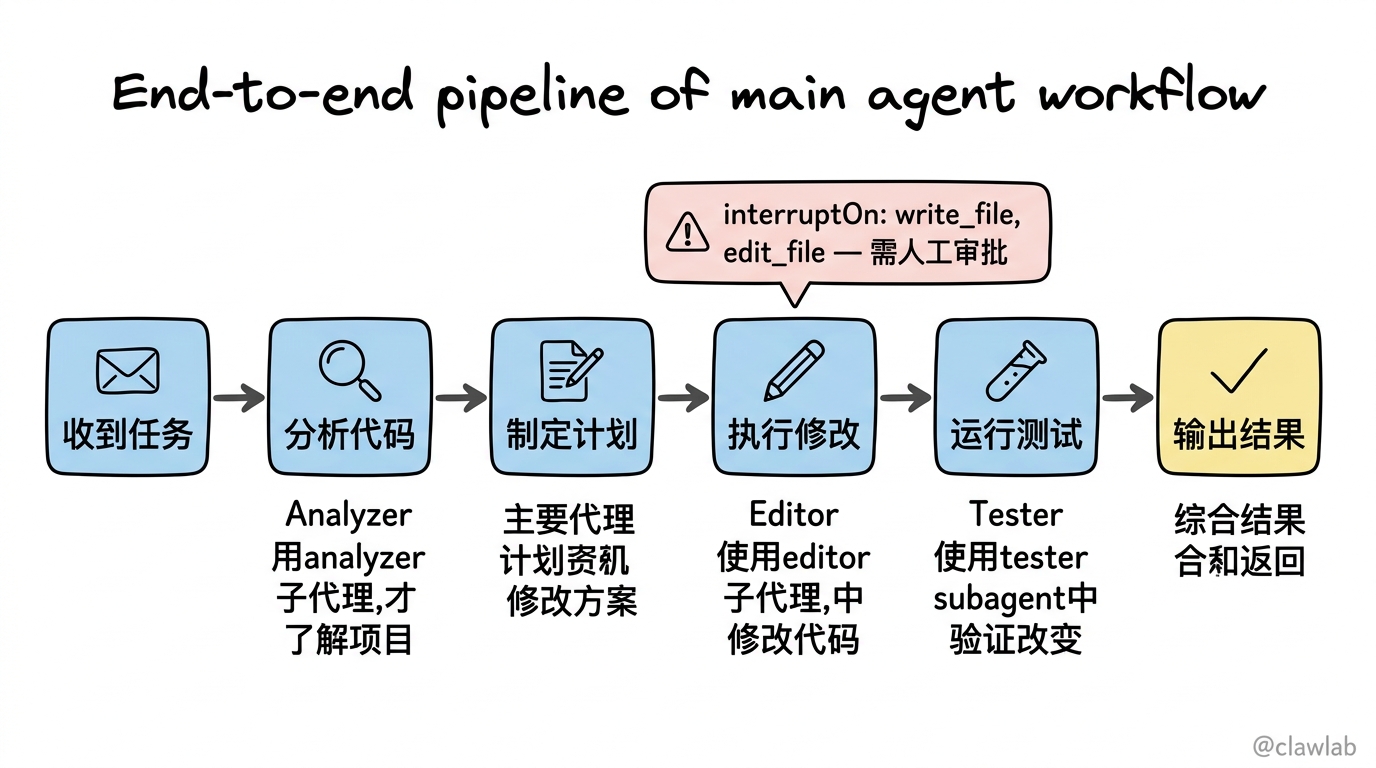
工作流程:
1. 收到任务后,先用 analyzer 子代理分析相关代码
2. 制定修改计划,用 editor 子代理执行修改
3. 修改完成后,用 tester 子代理运行测试验证

始终保持代码质量,修改前后都要确保测试通过。`,
    subagents: [analyzerSubagent, editorSubagent, testerSubagent],
    backend: createCodeAssistantBackend(projectPath),
    interruptOn: {
      write_file: true,
      edit_file: true,
    },
  });
}
使用示例
基础使用
typescript
// src/index.ts
import { createCodeAssistant } from "./agents/main-agent";

async function main() {
  const projectPath = process.cwd();
  const agent = createCodeAssistant(projectPath);

  const result = await agent.invoke({
    messages: [
      {
        role: "human",
        content: "分析这个项目的结构,并告诉我主要的模块和入口点",
      },
    ],
  });

  console.log(result.messages.at(-1)?.content);
}

main();
代码重构任务
typescript
async function refactorTask() {
  const agent = createCodeAssistant("/path/to/project");

  const result = await agent.invoke({
    messages: [
      {
        role: "human",
        content: `
请帮我重构 src/utils/helpers.ts 文件:
1. 将所有回调函数改为 async/await
2. 添加 TypeScript 类型注解
3. 运行测试确保改动正确
`,
      },
    ],
  });

  console.log(result.messages.at(-1)?.content);
}
错误诊断任务
typescript
async function diagnoseError() {
  const agent = createCodeAssistant("/path/to/project");

  const result = await agent.invoke({
    messages: [
      {
        role: "human",
        content: `
运行 npm test 时出现以下错误:
TypeError: Cannot read property 'map' of undefined
  at UserList (/src/components/UserList.tsx:15:23)

请帮我诊断并修复这个问题。
`,
      },
    ],
  });

  console.log(result.messages.at(-1)?.content);
}
流式输出集成
typescript
async function streamingCodeAssistant() {
  const agent = createCodeAssistant("/path/to/project");

  const messages = [
    { role: "human", content: "给 UserService 类添加一个 deleteUser 方法" },
  ];

  for await (const [namespace, chunk] of await agent.stream(
    { messages },
    { streamMode: ["updates", "messages"], subgraphs: true }
  )) {
    const source = namespace.length === 0 ? "主代理" : namespace.join("/");

    if (chunk.type === "AIMessageChunk" && chunk.content) {
      process.stdout.write(`[${source}] ${chunk.content}`);
    }

    if (chunk.agent?.messages) {
      console.log(`\n[${source}] 完成一个步骤`);
    }
  }
}
与 CLI 集成
也可以通过 CLI 使用代码助手功能:
bash
# 进入项目目录
cd /path/to/project

# 启动代码助手
deepagents --agent code-assistant

# 交互式使用
> 分析这个项目的架构
> 找到所有使用 deprecated API 的地方
> 重构 utils.ts 中的 fetchData 函数
> 运行测试并修复失败的用例
项目约定文件
创建 .deepagents/AGENTS.md:
markdown
# 代码助手约定

## 项目信息
- 语言:TypeScript
- 框架:React + Node.js
- 测试:Jest + React Testing Library

## 代码风格
- 使用函数式组件
- 优先使用 hooks
- 类型注解必须

## 修改规则
- 修改前先分析影响范围
- 保持向后兼容
- 修改后必须运行测试

## 测试约定
- 组件测试使用 RTL
- 工具函数使用纯单元测试
- 覆盖率要求 > 80%
小结
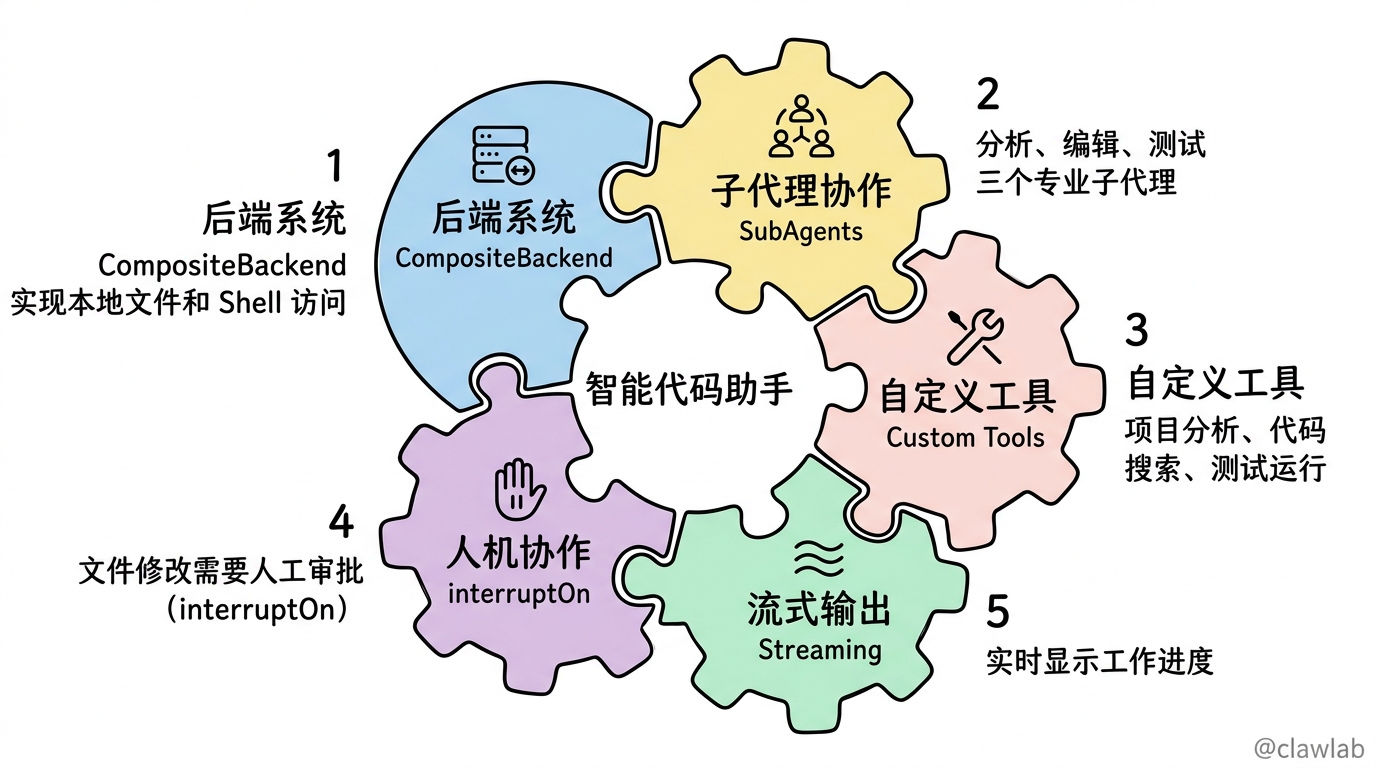
本文构建了一个智能代码助手,综合运用了:
- 后端系统:CompositeBackend 实现本地文件和 Shell 访问
- 子代理:分析、编辑、测试三个专业子代理
- 自定义工具:项目分析、代码搜索、测试运行
- 人机协作:文件修改需要人工审批
- 流式输出:实时显示工作进度
下一篇文章,我们将构建一个研究助理系统,展示子代理协作、长期记忆和流式输出的综合应用。